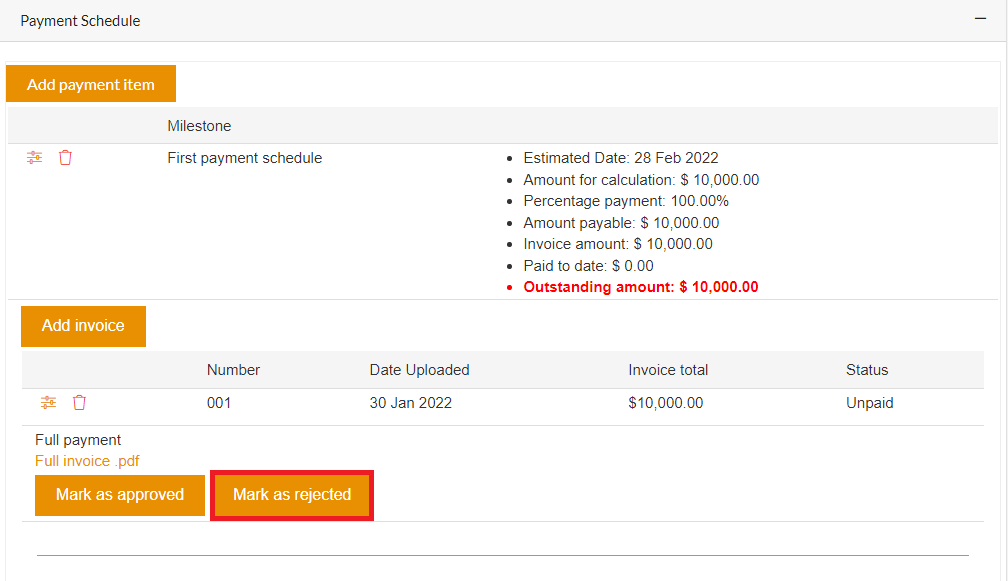
After an invoice has been created it needs to be approved and paid, or rejected.
The total contract amount refers to the awarded amount of the project. You cannot add a payment item that exceeds this amount.
The remaining milestone amount is determined by subtracting the total value of created payment items from the total contract amount.
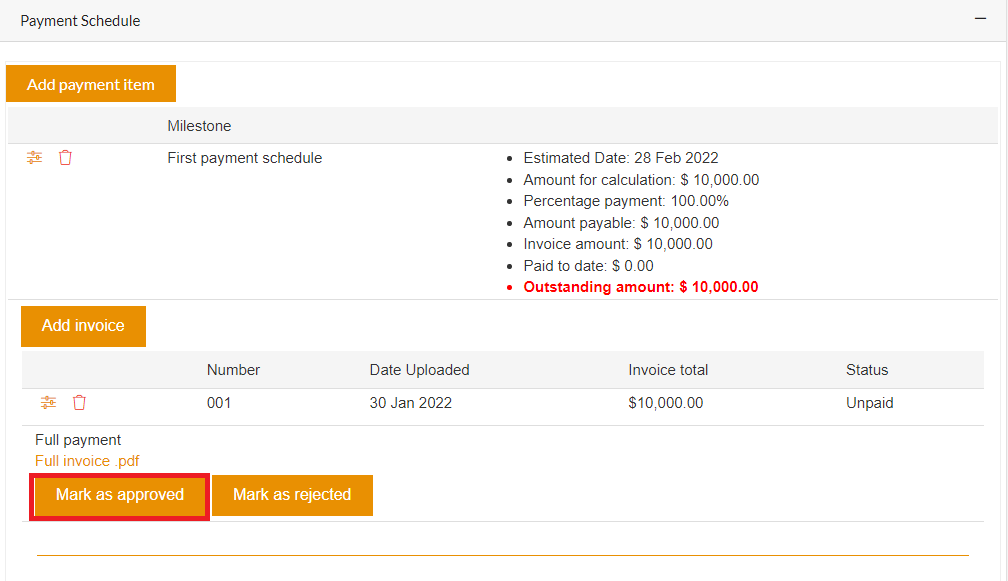
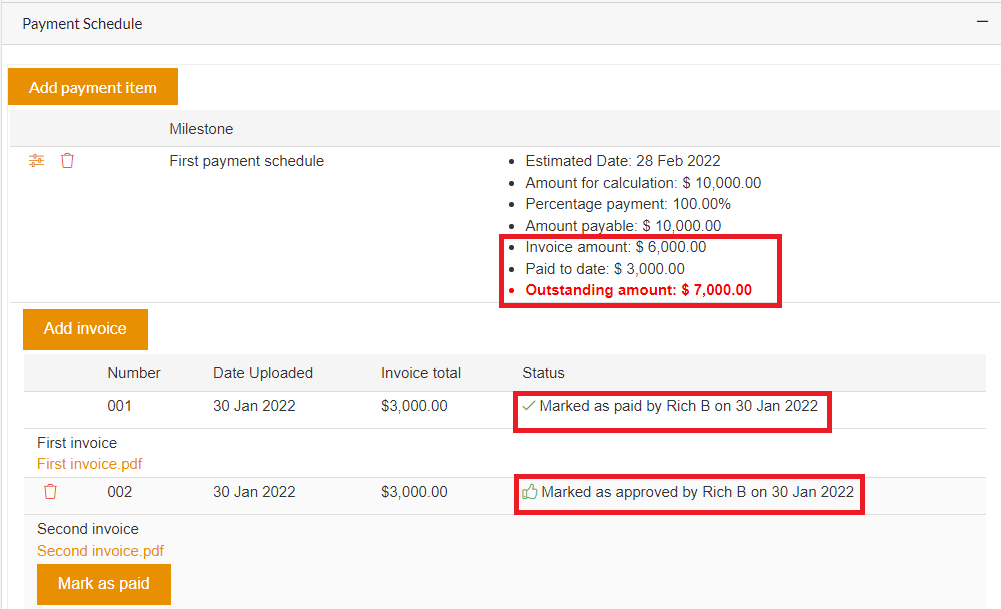
To approve an invoice click the Mark as approved button.
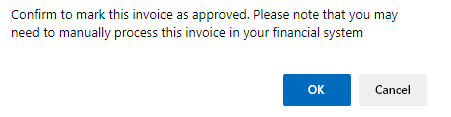
A confirmation will appear to confirm the invoice will be approved.
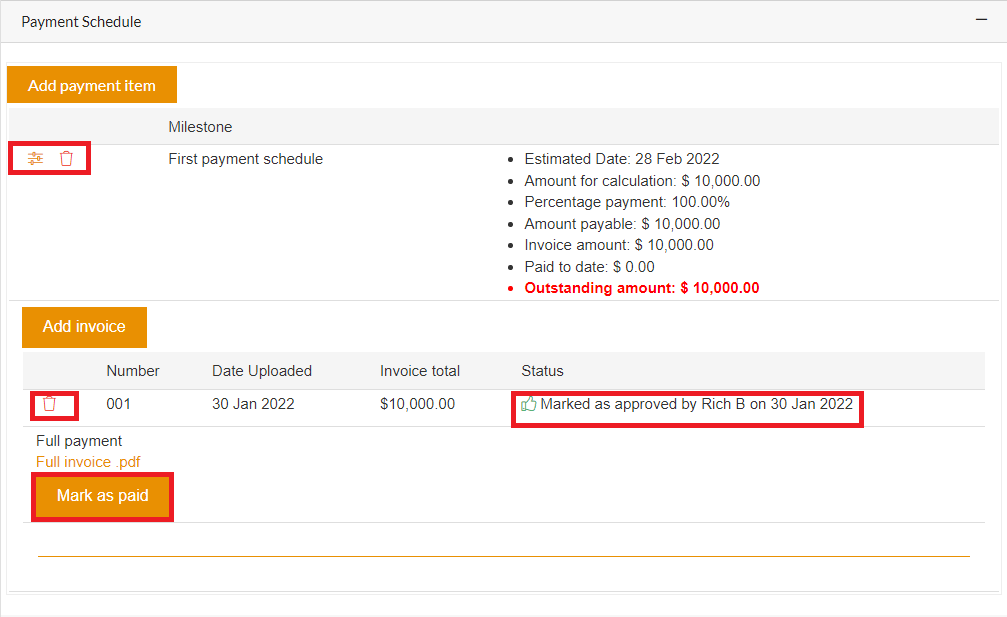
The status of the invoice will be Marked as approved with a Name/Date stamp of the person who approved the invoice.
At this point the invoice can no longer be edited it can only be deleted.
Note also that this point the Payment schedule can also be deleted.
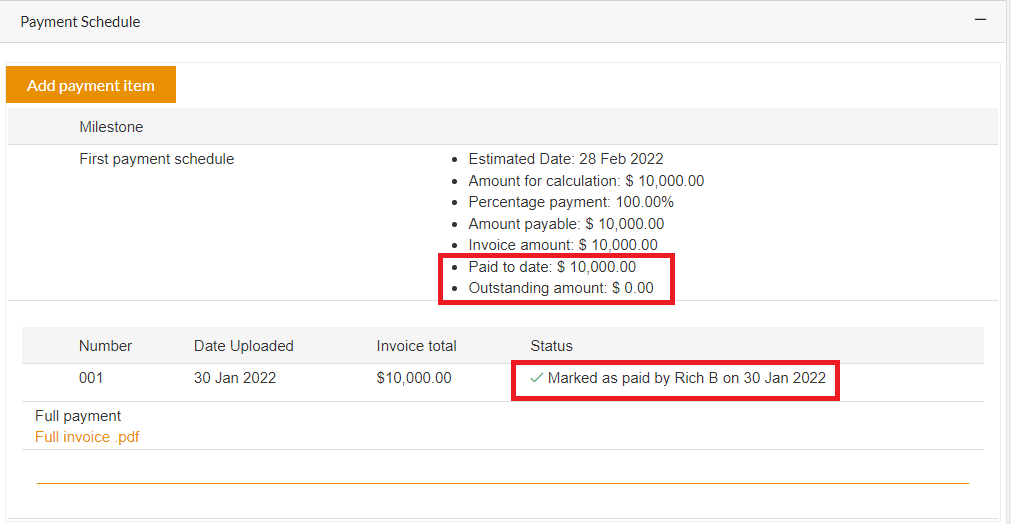
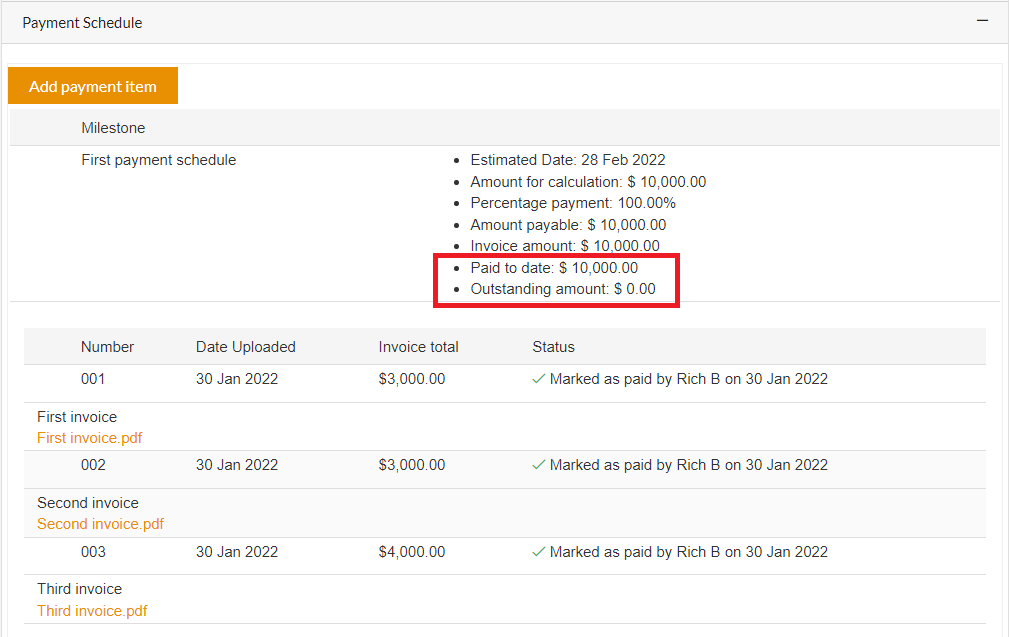
After the invoice has been paid the status will be changed to Marked as paid.
The Paid to date and Outstanding amount will also be updated.
After the Outstanding amount is paid it will change from red back to black.
Now the invoice has been paid in full it neither the Payment schedule or the invoice can be deleted.
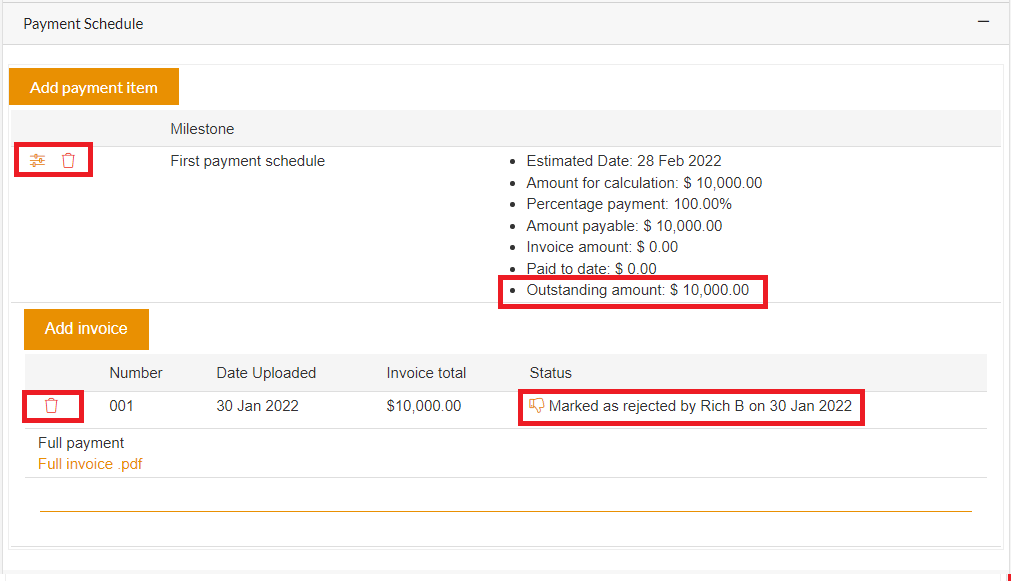
If the invoice is not approved click the Mark as rejected button.
A confirmation will appear to confirm the invoice will be rejected.
The status will change to Mark as rejected.
Now the invoice has been rejected it cannot be edited it can only be deleted.
The Payment schedule can also be deleted.
Invoices can also be split and paid separately
This is done in the same way, however instead of entering the full invoice amount, enter a partial amount.
Partial invoices can be create all at once, or a new invoice can be created after the previous invoice has been paid.
After creating multiple invoices the following will happen:
-
The Invoice amount total will show a total for ALL invoices created.
-
The Paid to date will show a total only invoices that have been paid.
-
The Outstanding amount will show a total for invoices that have been created (but not paid), and also include the balance that has not yet been invoiced.
After ALL the invoices have been paid the Paid to date and Outstanding amount will be updated.
Click the History icon in the Payment schedule to view the invoice payment history.