Adding and editing headings and sections
Creating document headings and sections
Once the document has been created you can start to create document headings and sections, if you have used a template or copied from a previous document/tender you can edit the existing headings.
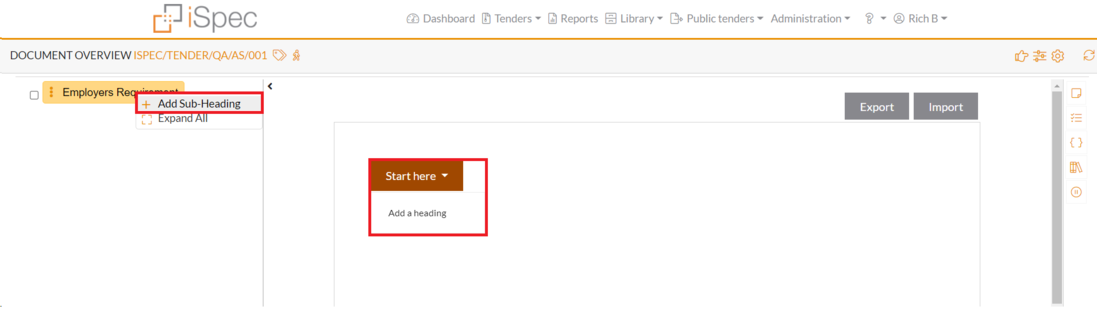
To create a heading right click on the document name in the outline tree or in the document and click Add a new sub heading or Add a heading
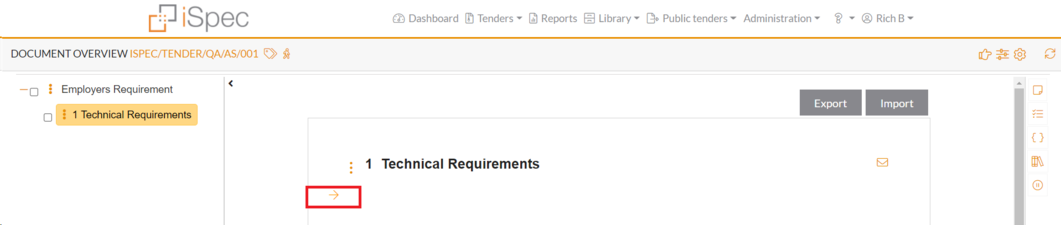
When the heading has been created content needs to be added for this we need to add sections.
Click the arrow underneath the newly created heading to add a new sections. You can link as many sections as you wish to a heading.
When a section has been added any pre-configured document type requirements will be also be added.
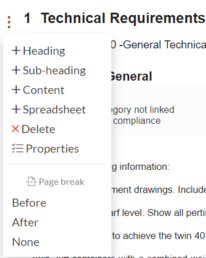
You can add more headings or sub headings by either right clicking the heading or click the heading menu in the document.
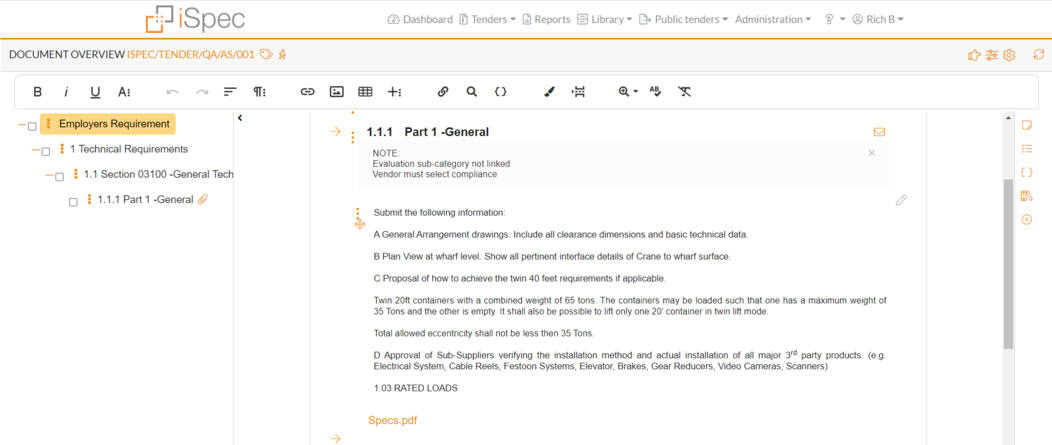
Click in the section to add content.
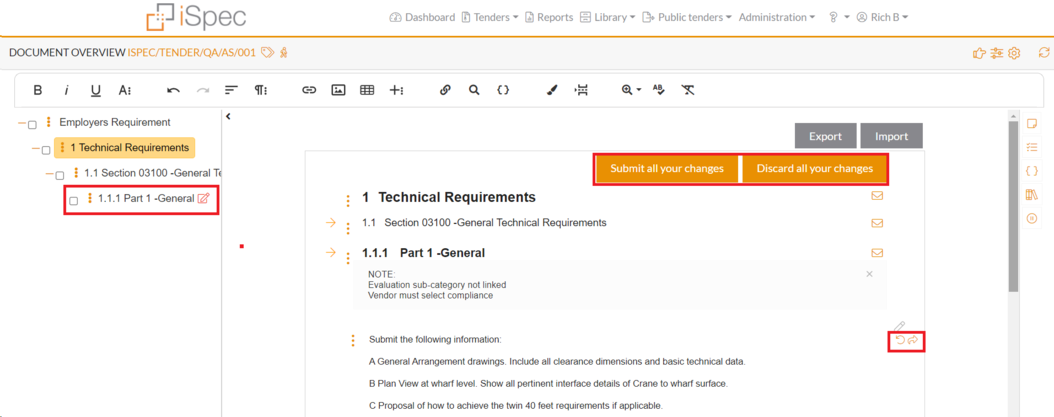
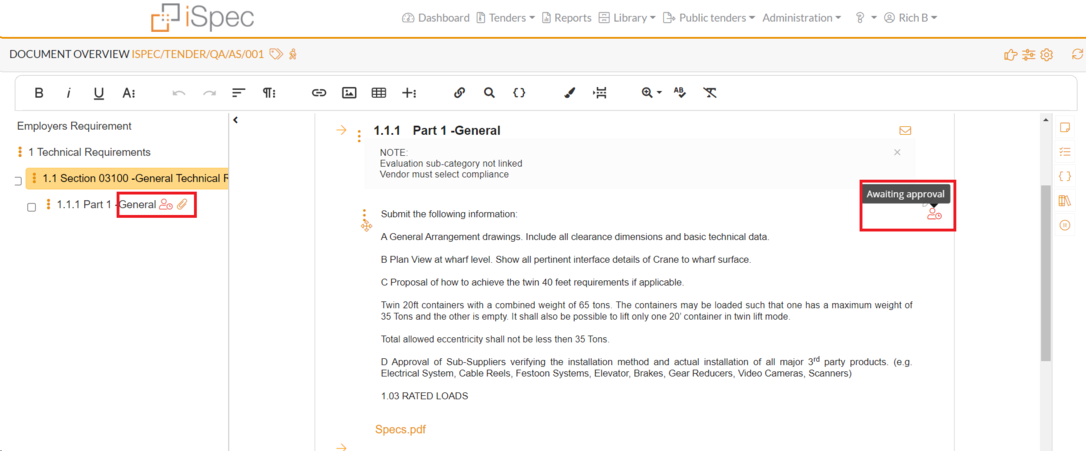
After adding content an approval icon will appear next to the heading name.
If the user doesn't have approval rights on they will need to submit the section for approval.
After adding content 2 icons will show next to the section, these are icons can either undo any edit changes and return to the previous version or submit the section for approval.
Each heading will also have a messaging icon to send a message related to that heading
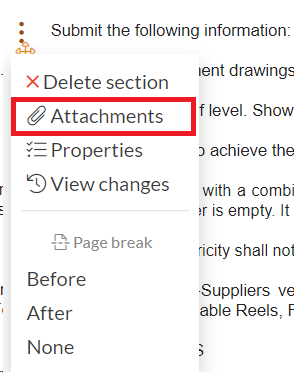
Attachments can also be added to any of the sections.
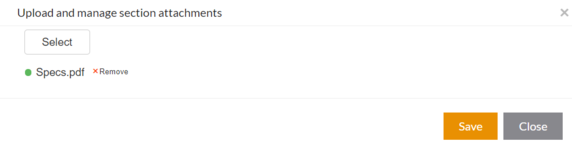
Use the section menu to add attachments.
Select an attachment and click to upload.
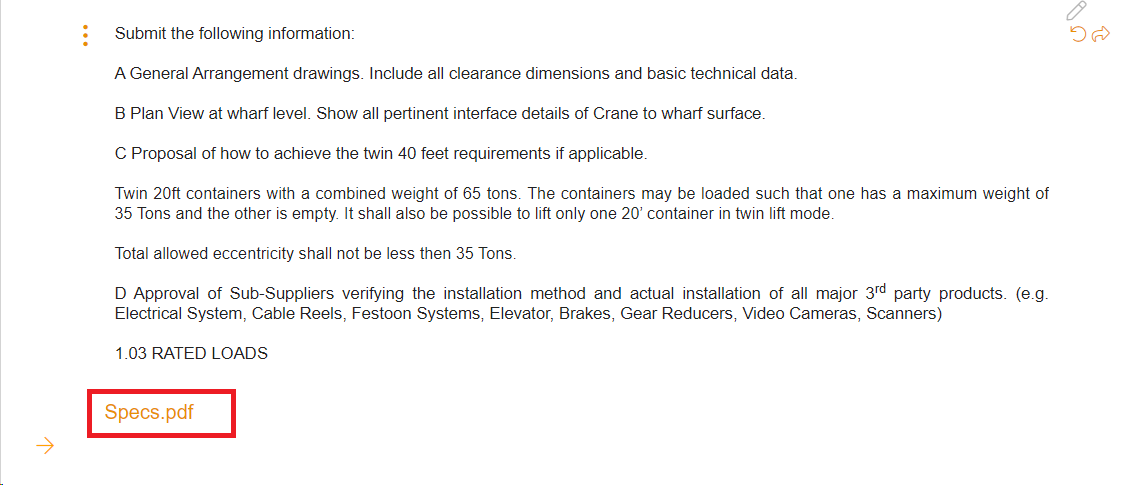
Attachment will now be added to the bottom of the section.
Submitting sections for approval
When you have created your headings and sections they are automatically saved as draft and need to be submit for approval.
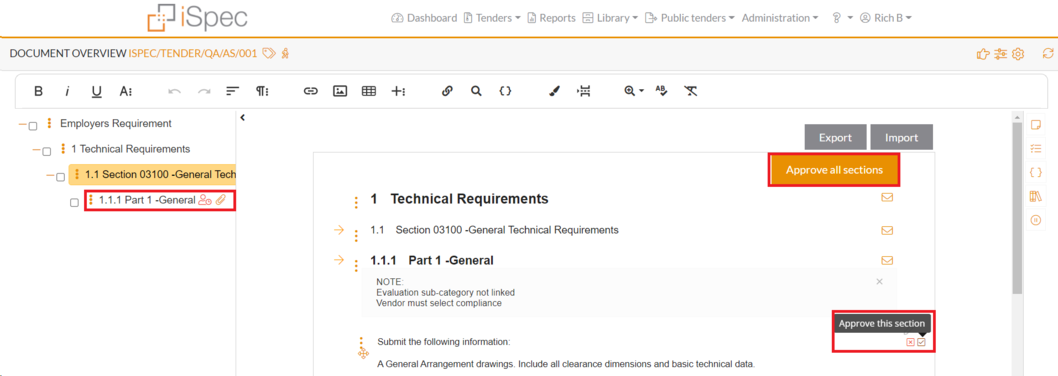
Click each section icon  to submit the section or click the
  button to batch submit ALL sections.
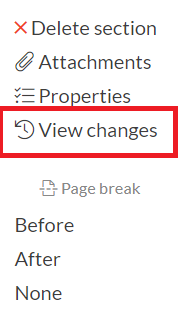
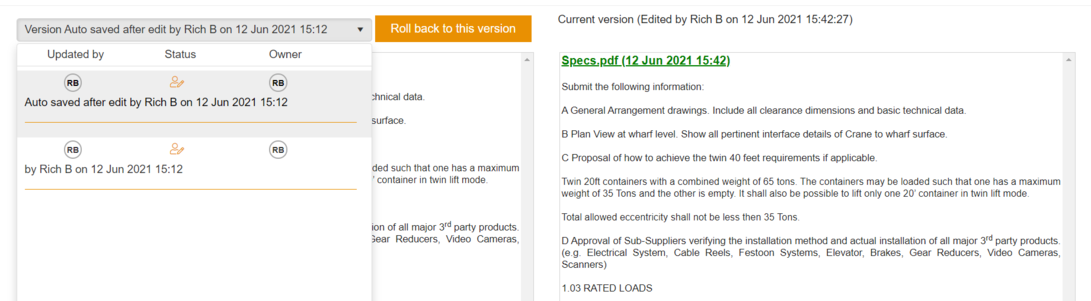
Every time a user edits the section a historical record is created.
To see this information click the View changes link.
Each revision that is saved and can be roll backed.
Added text is highlighted green and deleted text will be highlighted red.
After the headings or sections have been submitted the icon will change to show that the headings are awaiting approval.
Each time a section is edited it will need to be approved again.
Approving sections.
After the sections have been submitted for approval they need to be approved.
Only users who have a role which has the Approval permission on that document type can approve the document.
Click either the approve icon  next to each section or the approve button to batch approve all of the sections at once.
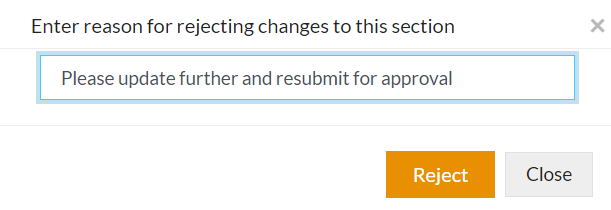
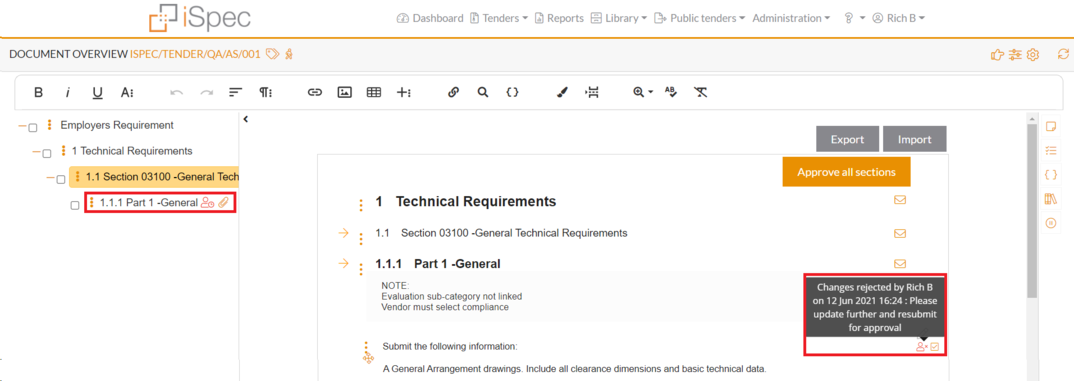
Rejecting the sections.
The sections can be rejected for approval and a comment entered.
After the section is rejected a rejection icon will show next to the section. The user can edit further and re-submit for approval.
After ALL sections are approved All the icons wil disappear.
When ALL of the sections and documents have been approved the tender can be published.
Lock/Unlock for editing
Documents in the Negotiation phase or higher are automatically locked upon publication.
To make modifications, you must first Unlock the document to enable editing.
Setting requirements
Clicking the heading menu Response requirements to set the vendor requirements.
This will override any settings that were applied at the document level.
All of the settings are as follows:
-
Vendor must enter a delivery date - If checked the vendor must supply a delivery date. **
-
Vendor must enter a commissioning date - If checked the vendor must enter a commissioning date.**
-
Vendor must enter a text response - If checked the vendor must enter a response to that item
-
Vendor must select compliance - If checked the vendor must specify if he is compliant with all aspects of the item, ie can deliver within the required date, if the vendor is not compliant they must specify a reason.
-
No Default - There will be no default vendor response
-
Comply Fully - The default vendor response will be set to YES
-
Cannot Comply - The default vendor response will be set to NO
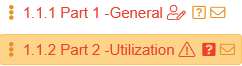
The image below illustrates the notification for non-compliant item submissions. A red square with a question mark identifies items that require attention. Once an internal user accepts the submission, this icon transitions to an unshaded orange square, indicating the non-compliant item has been accepted.
-
Vendor must supply pricing and optional text - If checked the vendor must supply a price for the item, and can enter an optional text response.
-
Item estimated cost - Set the estimated cost for each heading.
-
Vendor may edit units - If checked the vendor can edit the unit amount.
-
Vendor may view weighting - If checked the vendor can view the weighting score for each item.
-
Penalty in £/Day - Allows you to set a penalty for late completion.
-
Edit assigned weighting - When checked allows the user to edit weighting score that is set in the template, if this is not checked then user cannot change the assigned weighting. (Simple evaluations)
-
Max commercial score for this item - Sets the maximum score that can be used when that item a commercial score, if this is not set you cannot give this item a commercial score. (Simple evaluations)
-
Max technical score for this item - Sets the maximum score that can be used when giving that item a technical score, if this is not set you cannot give this item a technical score. (Simple evaluations)
-
Link to evaluation sub category - Links a heading to a sub category used during advanced evaluations.
(Advanced evaluations)
If your license has the advanced evaluation system module and it is switched on then the Max commercial / technical score is replaced with the Link to evaluation sub category option for more information on the evaluating vendor responses see the following link.