The sub tender function allows you to consolidate many smaller sections of a project into one large tender and manage them as a whole.
For example, let's say you want to install a new LAN at various locations. You may create a main tender plus It would consist of various sub projects for the different locations
To achieve this, create a "main" tender called for example "Government LAN Rollout" then create one "sub" tender for each of the locations.
There are 2 ways to link a sub tender to your tender, you can link a tender that has already been created and in preparation phase or you can create a new tender from the project overview page and iSpec will automatically link it after tender creation.
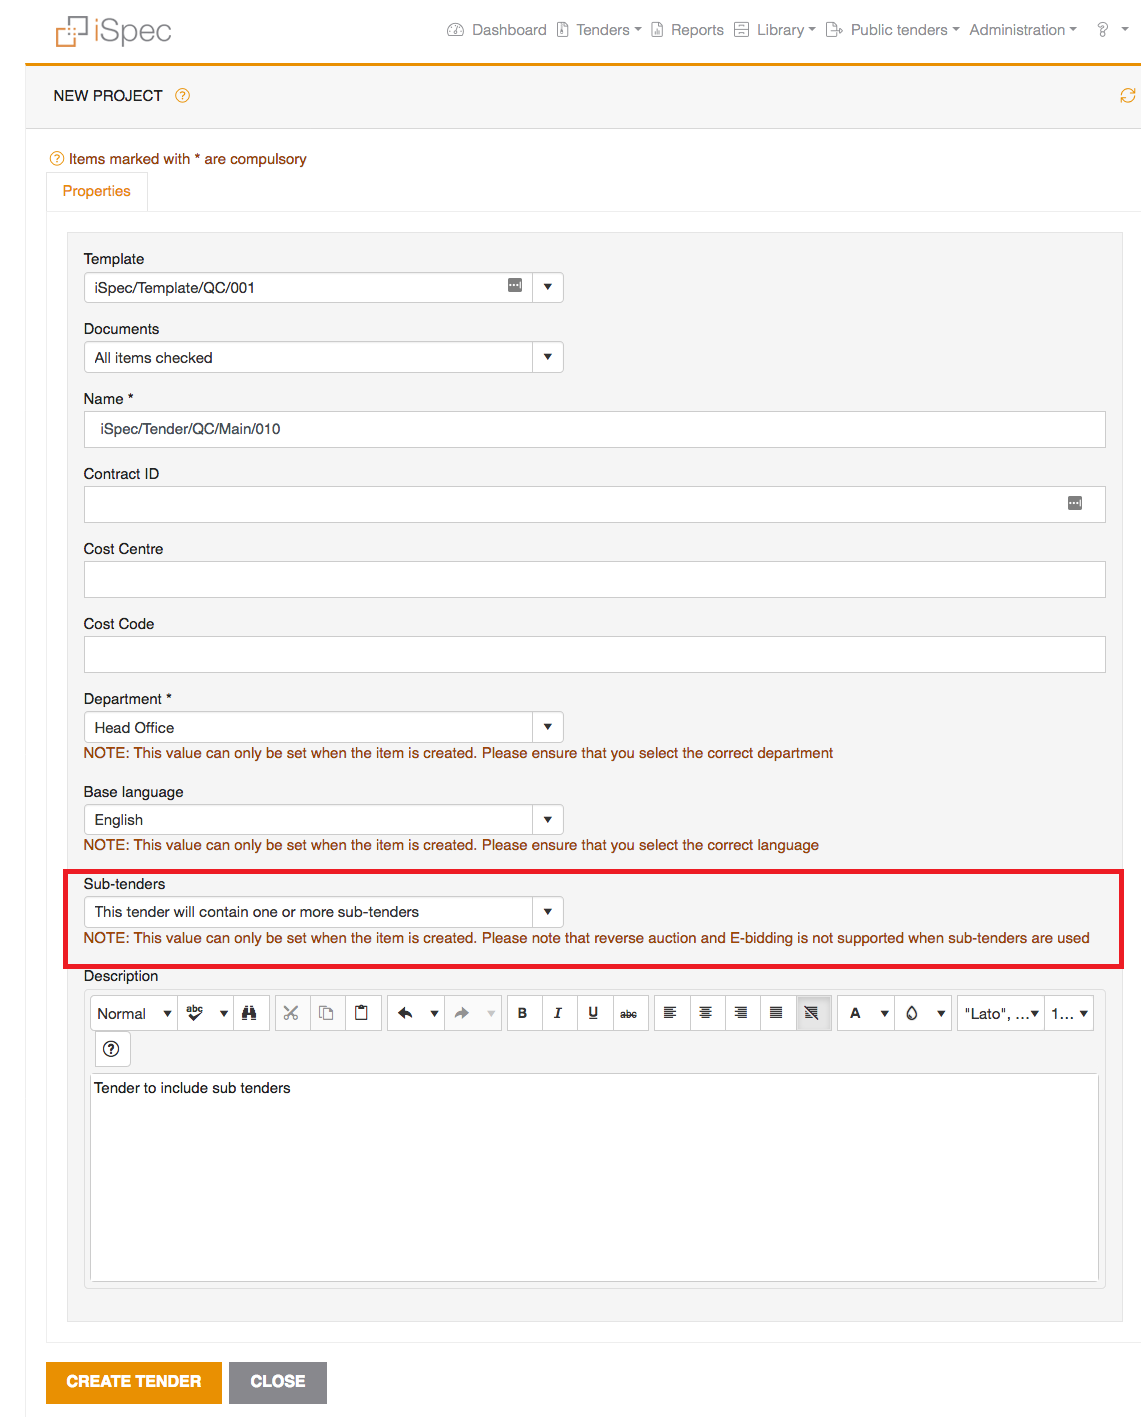
To create a sub tender you must select the sub tender option when you create the tender, if you do not select this option you will not be able to add any sub tenders and you will need to create the tender again.
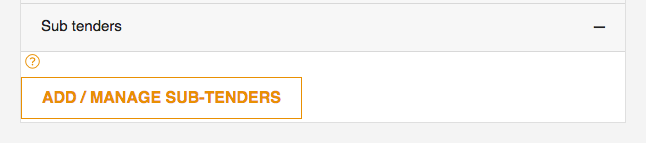
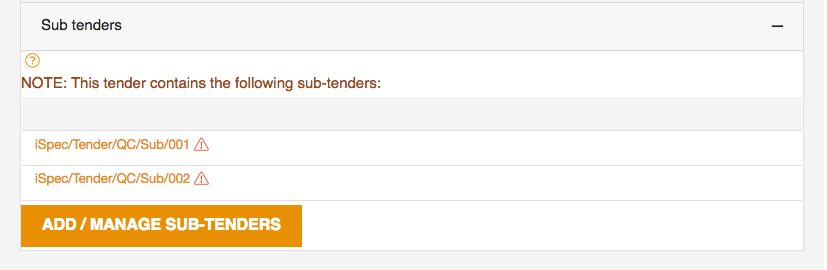
Once you created the tender a new Sub tender section will appear. To link a tender in preparation phase, expand the sub tenders section.
Click on Add / Manage sub tenders.
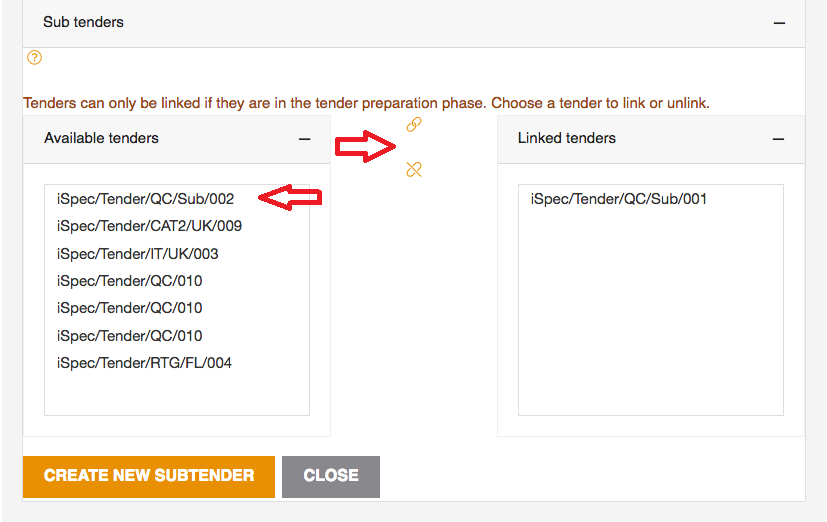
All tenders that are in preparation and available for linking will be listed in the Available tenders section, click the right arrow to move it to the Linked tenders section.
The tender will be moved from the Available tender to the Linked Tenders list.
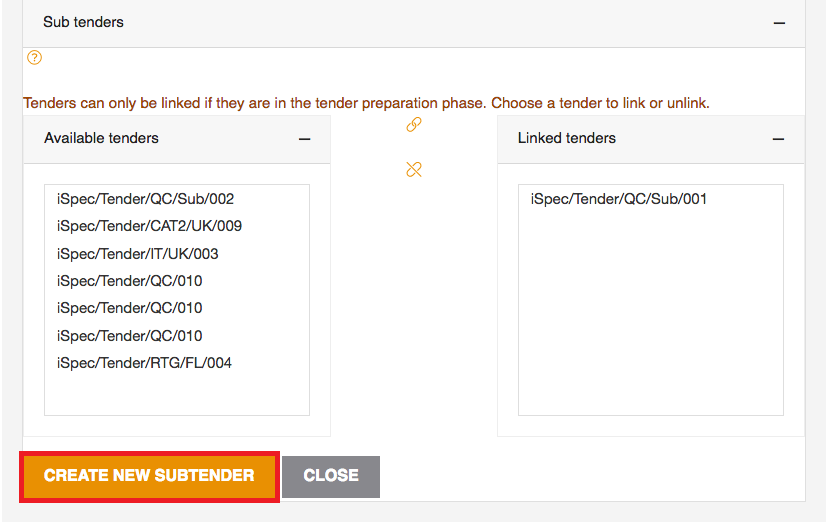
To create a sub tender from scratch and link it to the main tender click the Add / manage sub tenders link
Then click the Create sub tender button.
Once the sub tender has been create the properties screen appears, most of these settings will follow the main tender and will be greyed out.
If you are creating your sub tender from a template choose the template and select any or all of the documents from that template to include in your sub tender
Complete all fields and click Create subtender, iSpec will then create the sub tender and automatically link it to the main tender.
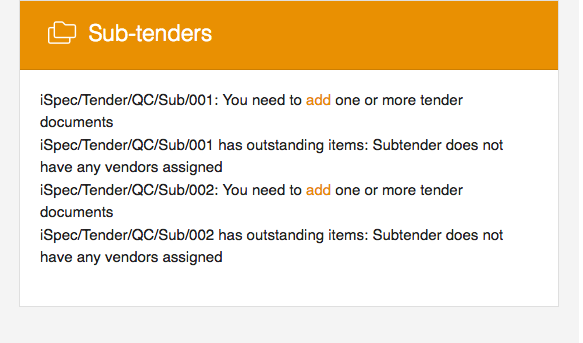
The To-Do widgets will list all outstanding items that need to be completed before the tender can be published.
Now prepare the documents in both sub tenders and the main tender just as you normally would.
When all sub tenders and main tender tab are complete and all approvals have been completed the tender will be published.
Restrictions of this method:
-
All sub tenders will follow the main tender publication dates.
-
Adding a vendor to a sub tender will automatically add the vendor to the main tender. This means the main tender should only contain documents/contract information that applies to all sub tenders. Data unique to a sub tender should be part of the sub tender. Typically you might want to put the milestone schedule (project plan) in the main tender, as the various sub tenders' delivery schedules will affect each other.
-
All sub tenders will follow the main tender tender settings for currency, additional currencies, evaluation system, RFx settings and approvals.
Benefits:
-
All phases/parts of the tender are managed together.
-
Costing for the entire project is automatically available.
-
Separate sub vendors can be invited for each sub tender, but some can quote on more than one sub tender if allowed.
-
Individual items in sub tenders can be assigned to different vendors or even excluded completely from the final contracts.
-
As negotiations regarding various sub tenders continue the effect on the total project cost is instantly visible.