Adding headings and sections
Creating document headings and sections
Once the document has been created you can start to create document headings and sections.
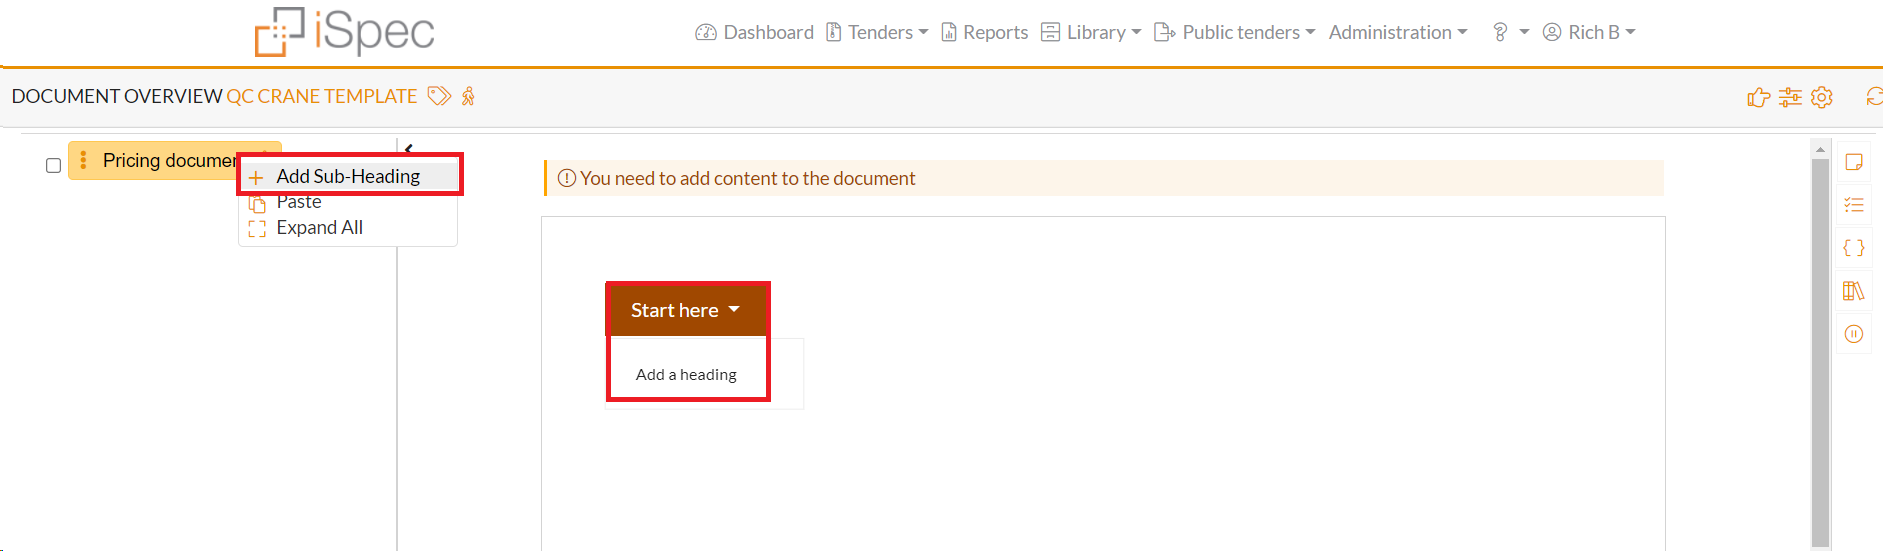
To create a heading right click on the document name in the outline tree or in the document and click Add a new sub heading or Add a heading.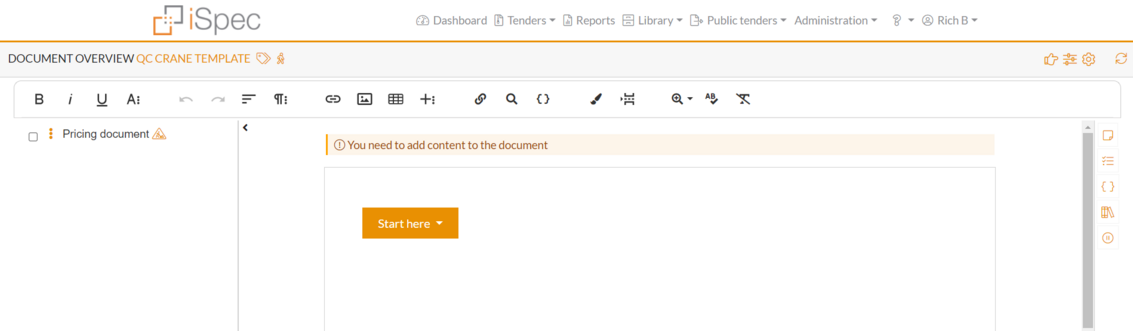
To create a heading right click on the document name in the outline tree or in the document and click Add a new sub heading or Add a heading.
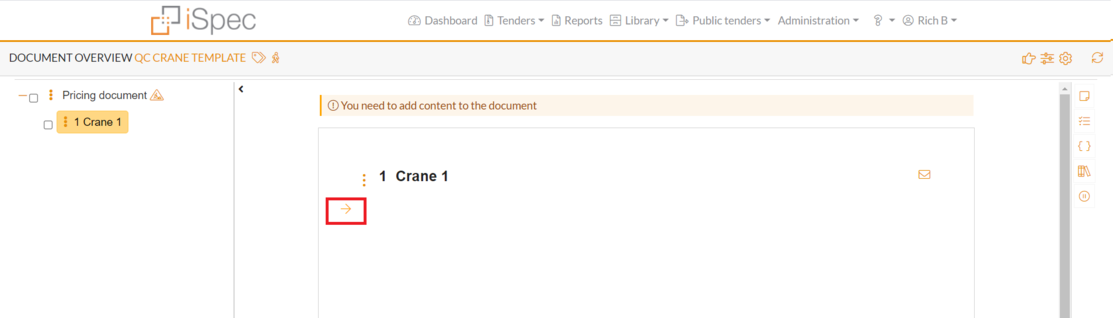
When the heading has been created content needs to be added for this we need to add sections.
Click the arrow underneath the newly created heading to add a new sections. You can link as many sections as you wish to a heading.
When a section has been added any pre-configured document type requirements will be also be added.
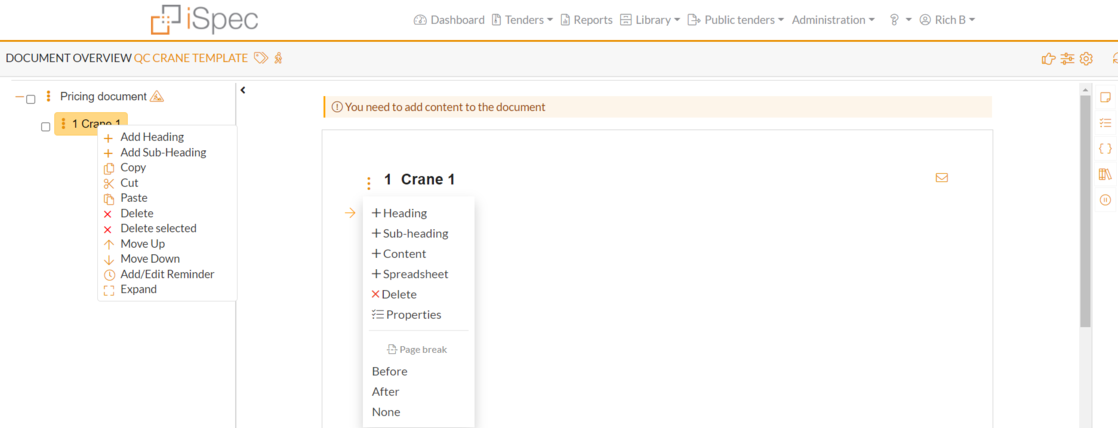
You can add more headings or sub headings by either right clicking the heading or click the heading menu in the document.
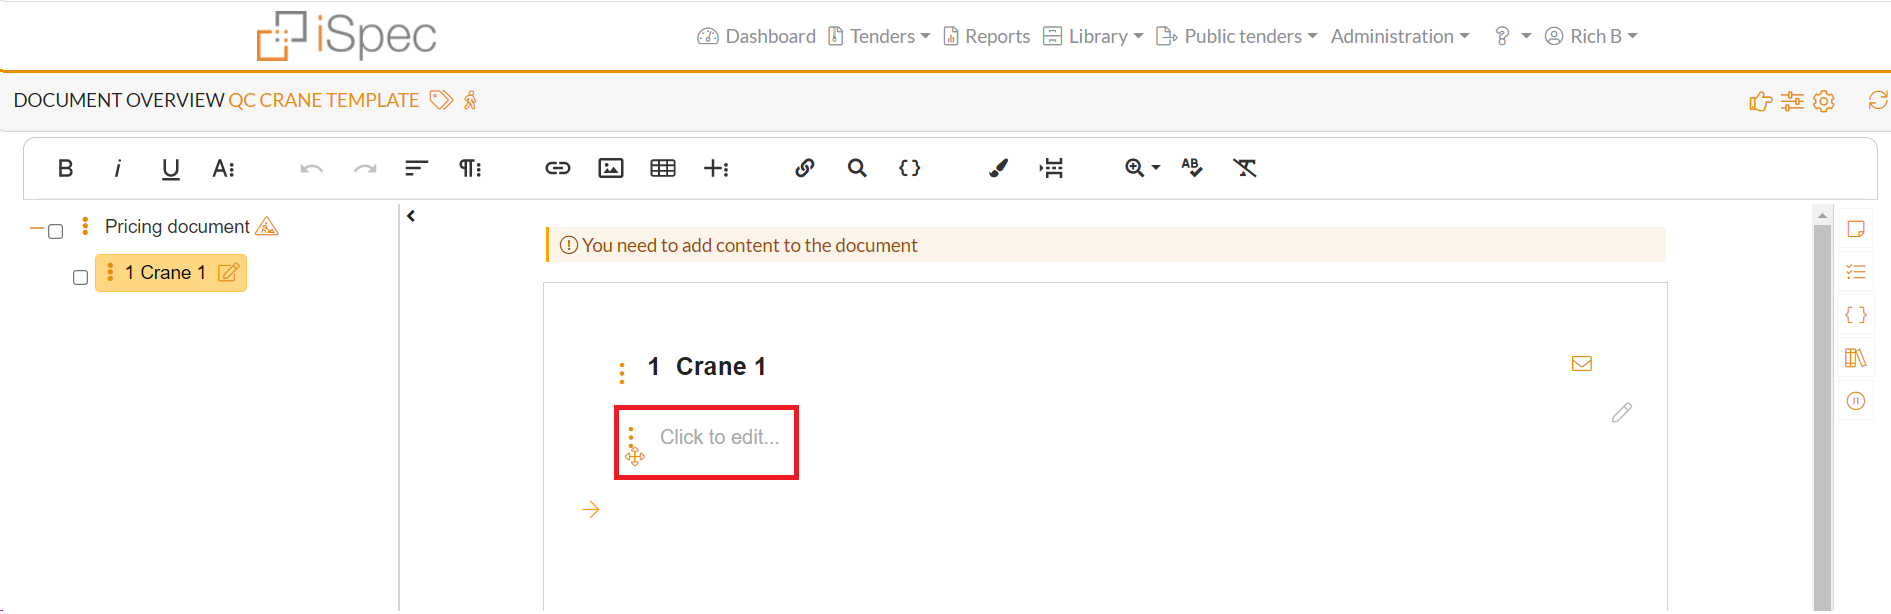
Click in the section to add content. As well as content you can add images, tables, lists, drawings etc the same you can in a Word document using either the quick menu
 or the editing bar.
After adding content an approval icon will appear next to the heading name.
If the user doesn't have approval rights on they will need to submit the section for approval.
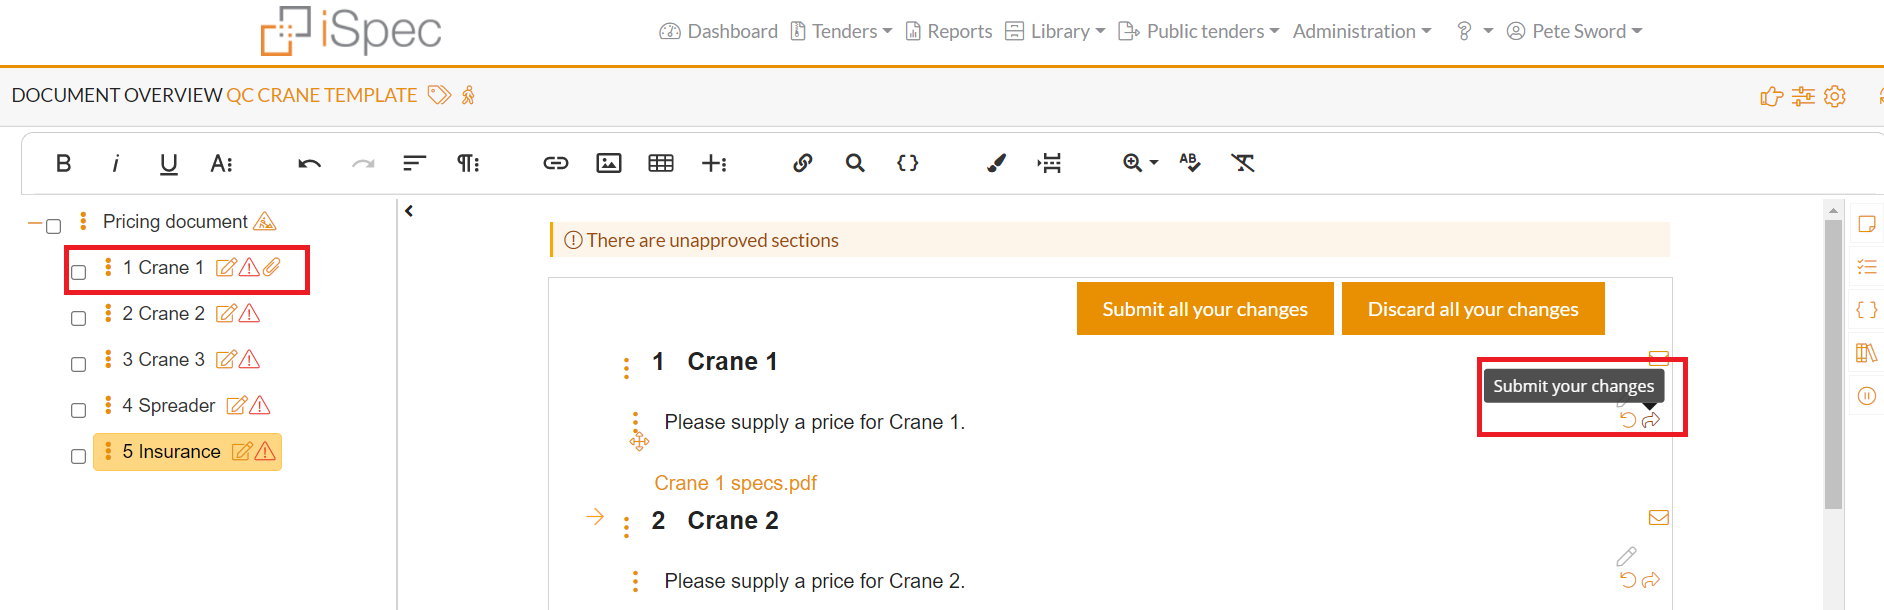
After adding content 2 icons will show next to the section, these are icons can either undo any edit changes and return to the previous version or submit the section for approval.
Each heading will also have a messaging icon to send a message related to that heading.
By default the template creator should be able to approve his own documents (provided they have the correct User type permission).
If any other user edits the content they will need to submit it for approval unless the creator has specified which user type groups can approve the document.
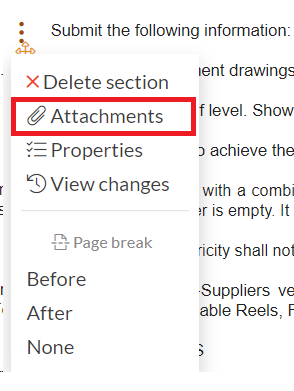
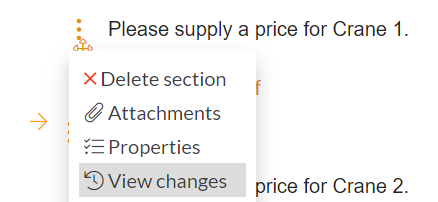
Attachments can also be added to any of the sections. Use the section menu to add attachments.
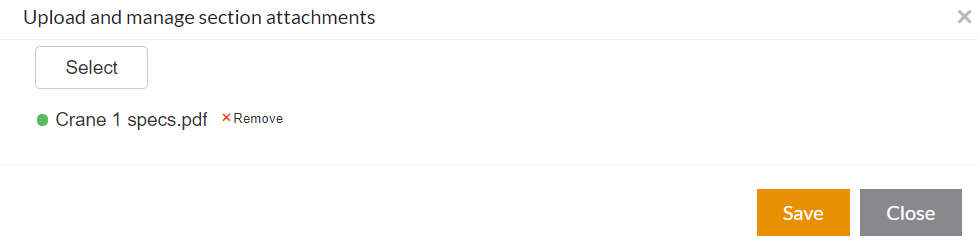
Select an attachment and click to upload.
Attachment will now be added to the bottom of the section.
Setting requirements
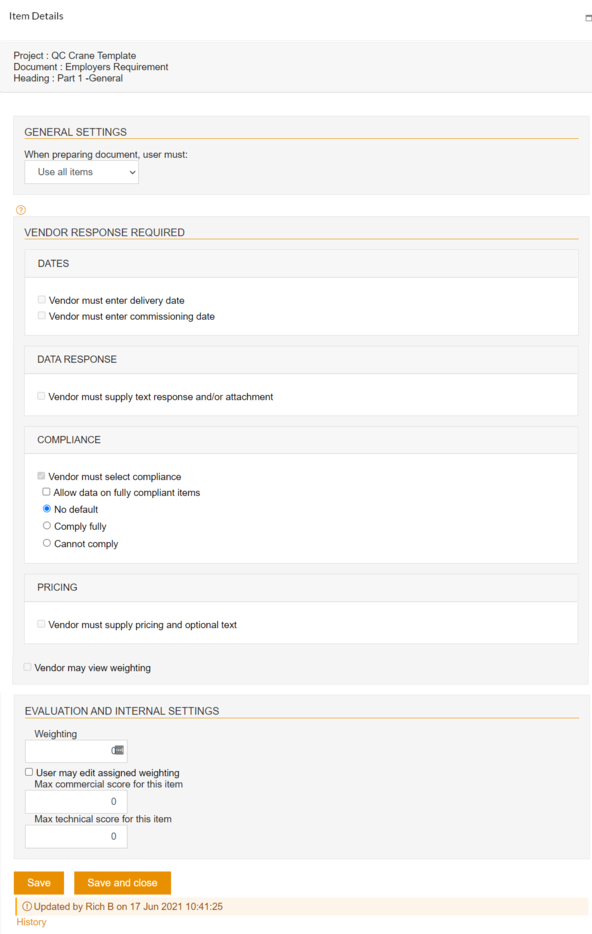
Clicking the heading menu Response requirements to set the vendor requirements.
This will override any settings that were applied at the document level.
Submitting heading and sections for approval.
If the user who edits the section is not the section owner or has an assigned user type that is able to approve the sections, they must be submitted for approval before the template can be made available for use in a tender.
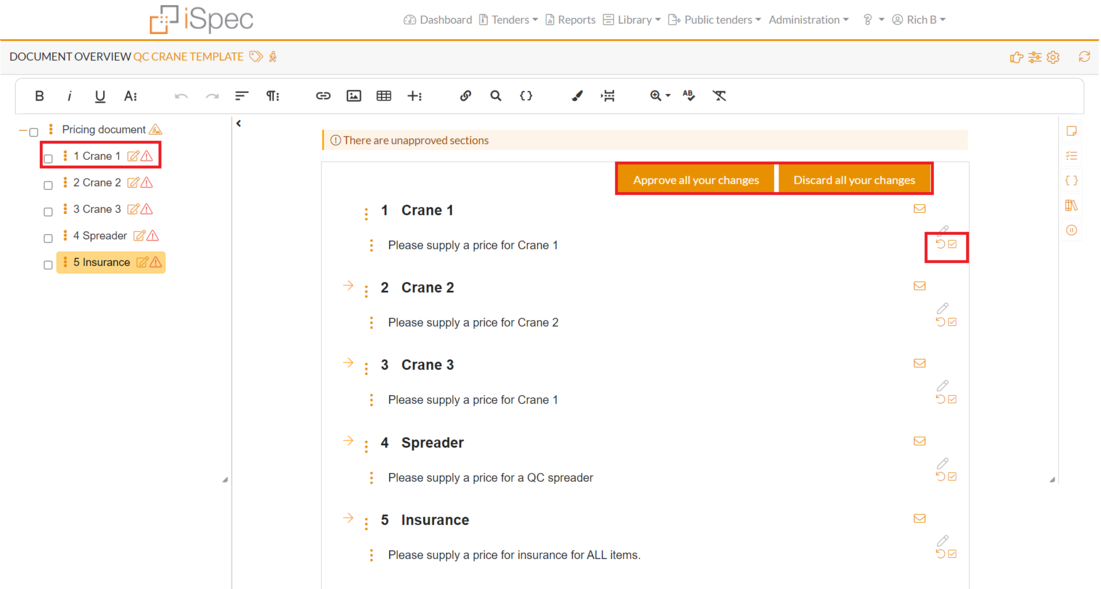
To do this, click either the icon to submit an individual section for approval, or click the Submit all your changes button to submit the whole document.
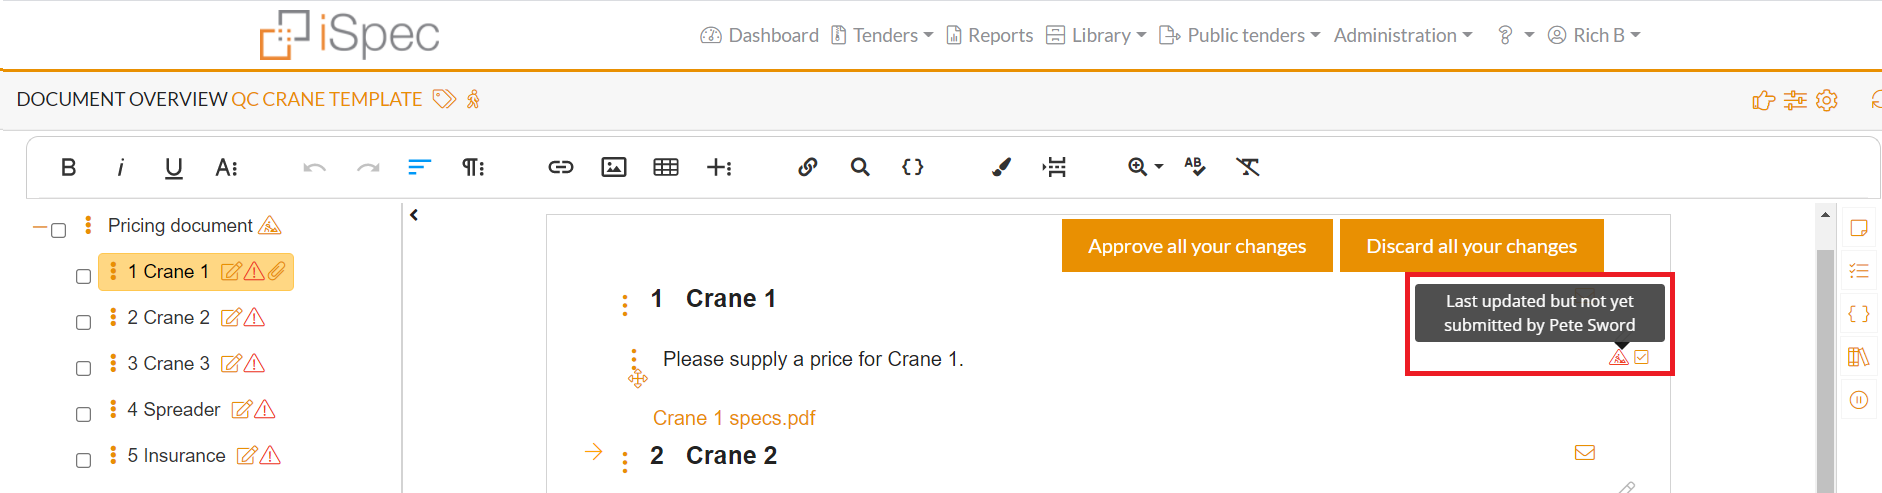
While another person is editing the document the document owner (and other users) can see who is editing the document and also that they have not yet submitted the sections or document for approval.
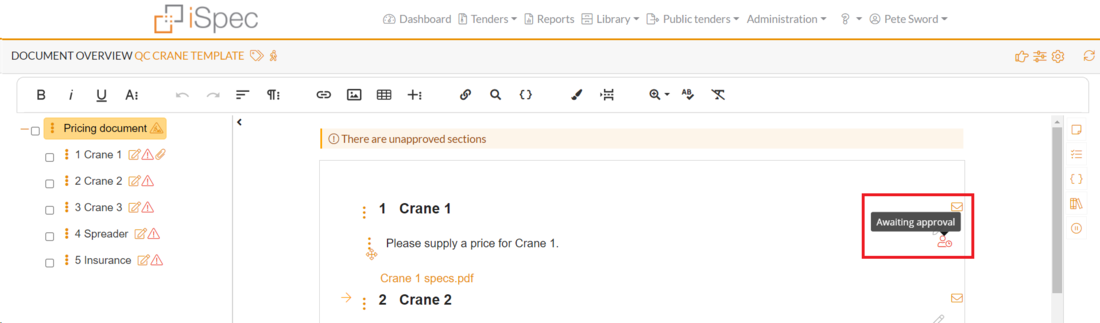
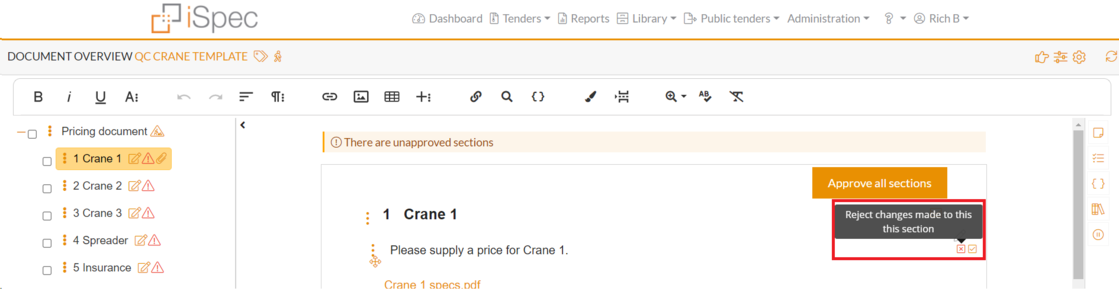
While the document is waiting to be approved the section icons will change to show that the section or document is awaiting approval.
Approving heading and sections.
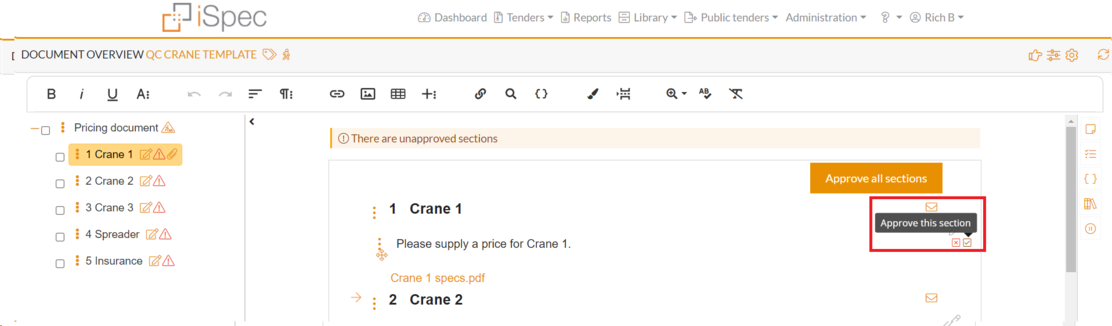
When the sections are ready for approval the document creator can approve all of the changes in the document. They can do this either by approving each section by clicking the approve icon  or they can approve all sections by clicking the Approve all sections button
  at the top of the document.
If the section was submitted for approval by another user and the approver feels further editing is required they can reject the section.
Enter a reason for rejecting the section and ask the user to edit and submit for approval again.
After the document has been approved all of the approval icons will disappear.
However if any section is edited again it must be re-submitted for approval.
View edit history
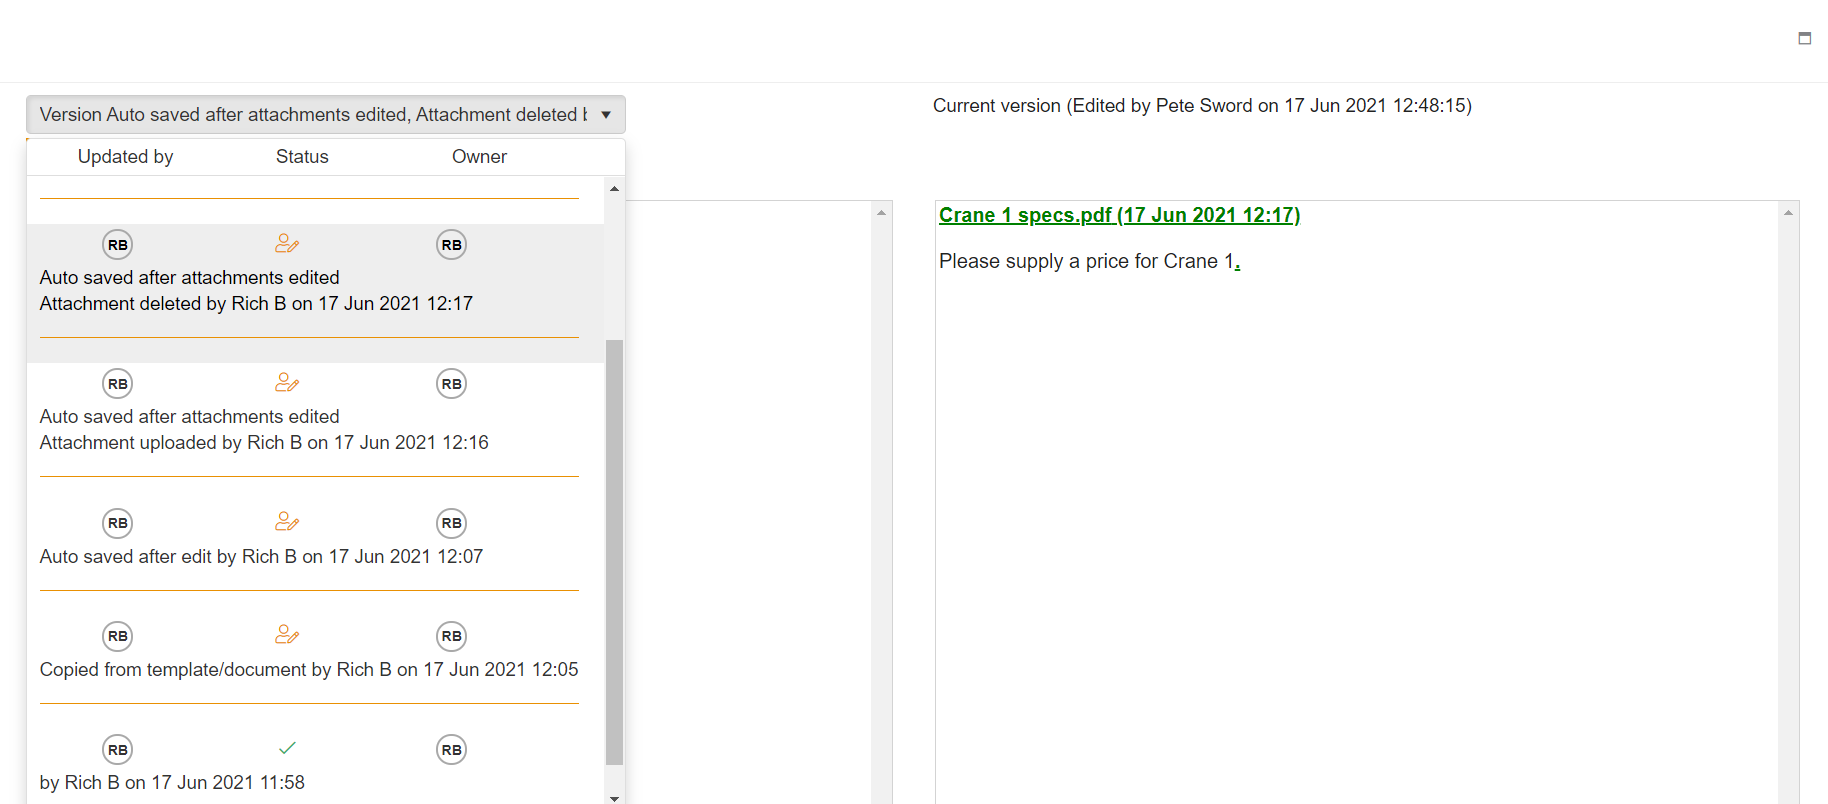
Every time a section is edited a history record is created so that user can view or roll back to a previous version.
To view historical version click the View changes section link.
All of the section history is listed. Any content that was deleted will be highlighted red and any content added will be highlighted green.
You can roll back to any previous version by selecting the version and clicking the Roll back to this version button. 
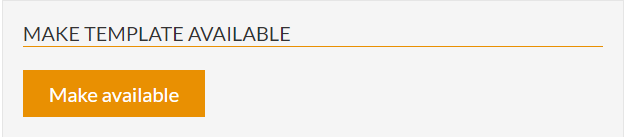
Continue this process until all the documents are complete and then make the template available for use from the template overview screen.
Note: When the template is made available no further editing is allowed the template must be taken offline to edit further.
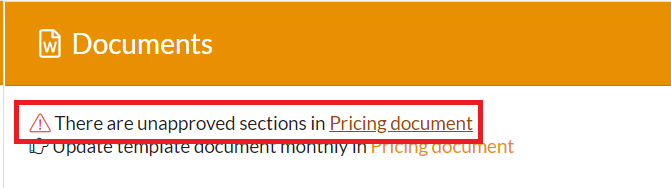
Any unapproved sections can also be seen in the template overview screen.