General document procedures
Each document that makes up part of the document set for a specific type of project, can be edited separately and its contents modified. Just like you would add headings in a Word document using headings in an outline format and then typing paragraphs of text below each one, so you can create headings in an outline and link ready made paragraphs from the library. Thus re using standard paragraphs over and over without having to re enter or copy and paste them. And as the library master is updated, so are the documents using them as well.
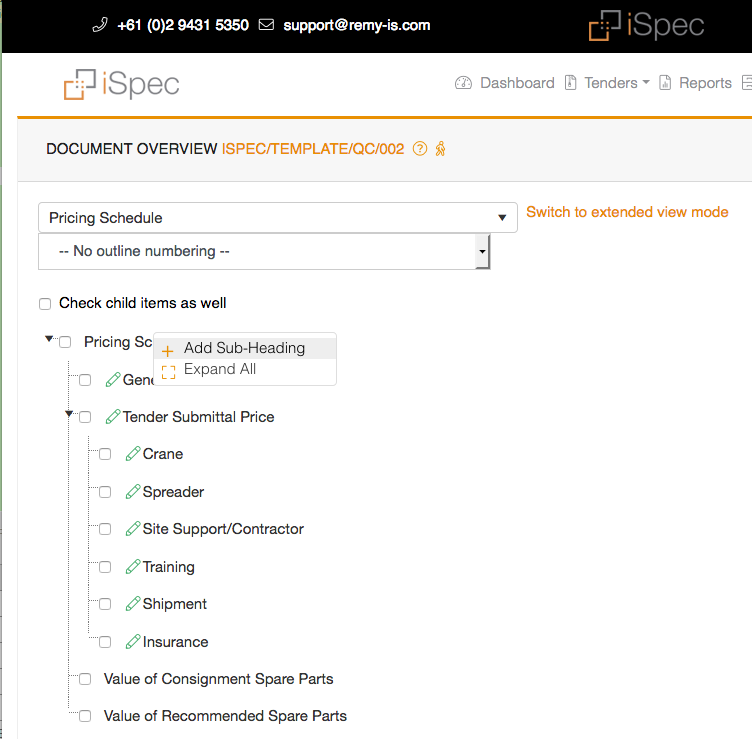
When you create a new document it will be empty. This works in a manner similar to the document map view in MSWord if you have used the outline feature. If no headings exist, right click on the document name and select Add subheading.
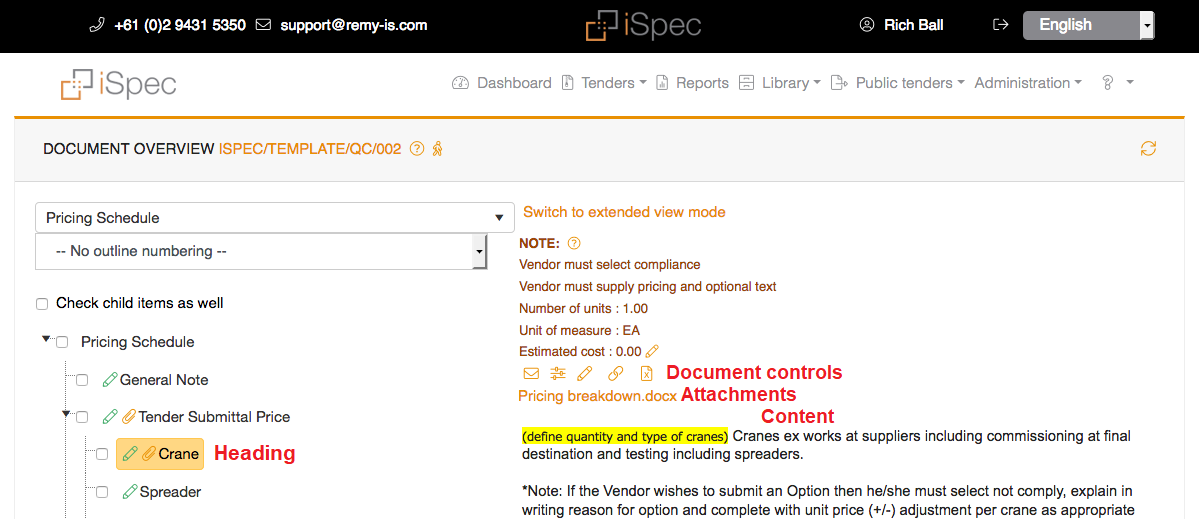
Once you have created your headings you need to add text and attachment, below is a typical example of a heading with text and attachments.
You will see the paragraph displayed on the right and just above it any attachments (pictures, spreadsheets, etc.) which you may view by clicking on the links. Just above the attachment you will see the controls for that heading, opening the pencil icon allows and then details you can see the Library group, paragraph type and actual generic paragraph name. If you would like to view it in a different language, click on the select language drop down list and you will see a list of languages in which this specific paragraph might be available. You may also Unlink (remove) a paragraph or move it up or down to change the order of display by clicking on the appropriate link.If the paragraph name is in red it means it is under construction and has to be approved before this template can be made available for use in a tender.
The document outline has exactly the same function as the outline function in a Word document. It sets out the various paragraph headings in a structured format. You can add, copy, cut, paste and delete these items in the same way that you would in a document by right clicking on a heading in the tree and then selecting the action from the pop-up menu. If copy or cut is used, you may then select another heading under which to paste the copied or cut items. By clicking on a heading, you can display the paragraph text on the screen for viewing and editing. When you copy or cut and paste an item, that heading plus all its sub headings and all paragraphs and attachments are copied and pasted If you would like to change the order in which these headings are displayed use the move up and move down menu items or use drag and drop.
You can now add content by either adding it from scratch. This will automatically add it to the master library as you are working in a template. The other options are to link an existing clause from the library or to import clauses and headings using a spreadsheet.
Once you have your first heading in a document, other options now become available to you.
You may also switch to the document preview or extended view mode. This will give you a preview of the complete document. Use the icons to access the messaging system, heading properties and edit the content respectively.
For further instructions see the Contents section