Although the model with basic startup symptoms (hoist problem, trolley problem, etc.) is sufficient to do accurate troubleshooting, rules (experience) can be very useful in speeding up troubleshooting for well-known problems.
There are different types of rules and they can be implemented into the system in different ways.
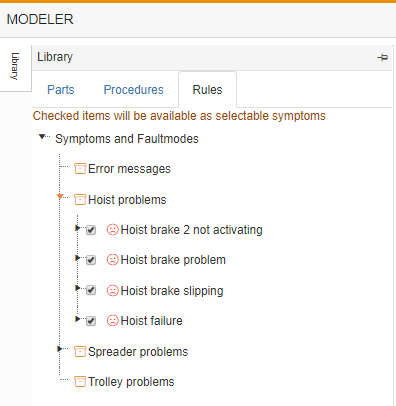
Symptoms
Startup symptoms are functional failures, symptomatic behaviour, error messages and the like that we experience in a system that alert us to the fact that something is wrong.
These symptoms are very useful in starting our troubleshooting session, as they often contain information on one or more of the following:
-
Which subsystem has failed
-
Which test points have failed
-
Which items have NOT failed
-
Which components may be more suspect than others
(See the related links below on how to add these symptoms to your model)
All fault modes with their check box checked, will be shown (visible) in the symptoms list in the sample runtime interface. These can then be selected by the user and will be triggered.
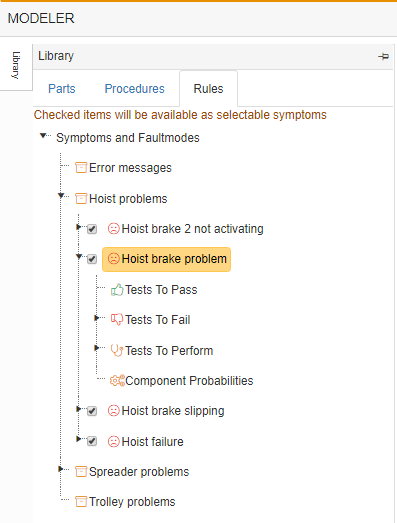
Test point rules
Sometimes the way in which a specific test fails also contains valuable information. For example, voltage low at a test point as opposed to 0 Volts may indicate faulty transformer rather than a tripped circuit breaker. In such cases, we can build a rule to reflect this and link it to the relevant test point.
When that test fails, the question may be asked as to which fault mode occurred and depending on the answer, the system will dynamically re- optimize its test pattern.
(See the related links below on how to add these symptoms to your model)
Any rules or fault modes that are not set to visible, need to be linked to at least one test point or they will never be triggered. There are only two ways of triggering a rule. Either by selecting a symptom in the visible symptoms list, or if the rule is linked to a test point, by making that test point bad.
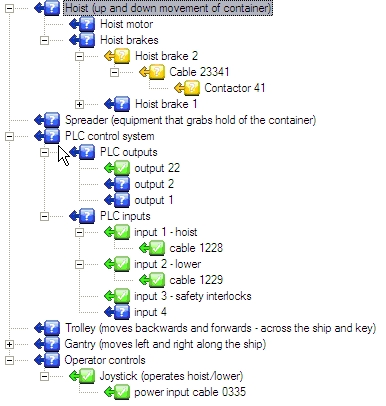
Looking at our example of the crane model, let's demonstrate some of the above principles.
We can see that we have entered 3 symptoms related to the hoist brakes.
The first one tells us that the problem lies only with brake 2, thus we can immediately report a bad test to the output of hoist brake 2 and a good result to PLC output 22 (as we know hoist brake 1 is activating and both are activated by the same PLC output).
Making only hoist brake 2 output bad, would leave all components back to the joystick suspect.
Leaving us with 11 suspect components. However adding the good result to PLC output 22 reduces the suspect list to 3 possible causes:
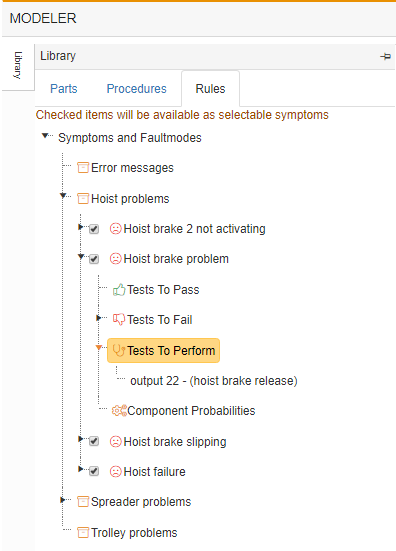
In addition to adding this a priori information, we may also tell the system where we would like it to test. Thereby overriding its own test pattern or choice of next-best-test.
This can be done by adding items to the Tests-to-perform list.
For example, if we had a hoist brake problem, we might want to force an immediate test of the PLC output to see if it activates when we give the hoist command.
The system will perform all tests on the list from top to bottom in that order.
The system will handle potential conflicts in the following manner.
As it goes down the list of Tests to perform, it will first check if the test already has a test result (good or bad) and if not, it will perform the test. If the test already has a result, it will skip that test and go on to the next one on the list.